If you’re moving and want to put your stamp on your new property, or if you’re simply looking to do a little work on your current home, there are a whole host of DIY skills you can utilise to save money.
Many people are novices when it comes to DIY, but with the confidence to tackle some basic jobs, you can improve your home and you’ll have a skill to take with you throughout your property journey.
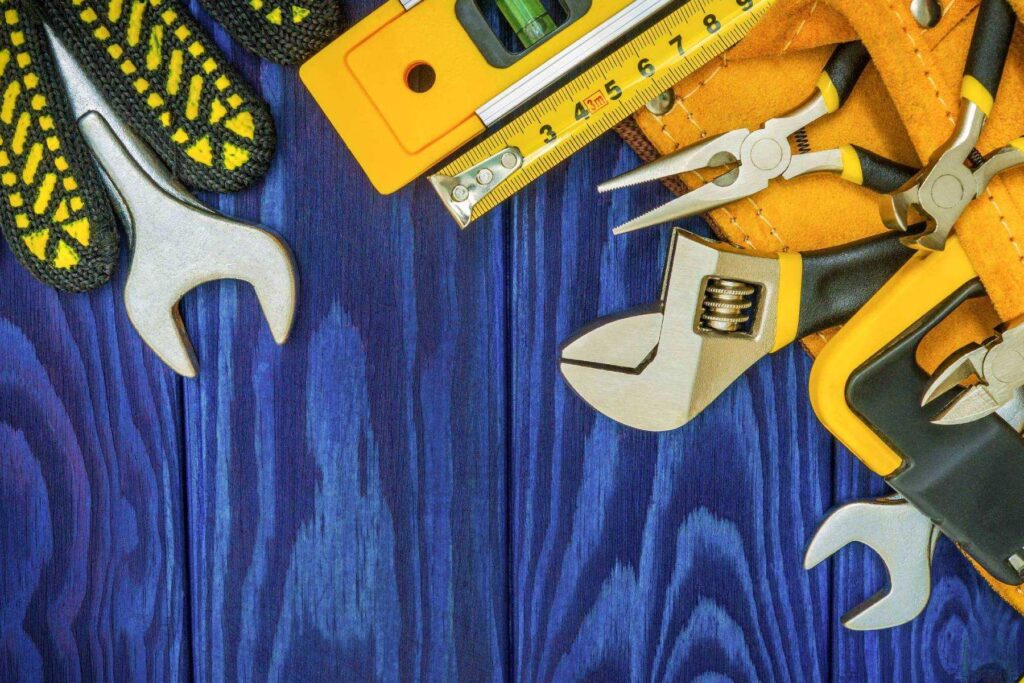
Here, we’ll reveal 10 basic DIY jobs every homeowner should be able to do themselves and name the five key tools you’ll need to complete most DIY jobs…
What does DIY stand for?
DIY stands for Do It Yourself.
But while the acronym DIY can spring up thoughts of simple household tasks like hanging pictures or putting up shelves, more complex jobs you take on without a professional would also be considered DIY.
What are basic DIY skills?
Basic DIY skills include being able to:
• Wire a plug
• Wire a light switch
• Paint a room
• Fix a leaking tap
• Change a light bulb
• Clear a blocked drain
• Use an electric drill
• Use a caulk gun
• Use a spirit level
• Reseal a bath
Five must-have tools for DIY
Being able to tackle DIY tasks requires the right tools to do the job.
Here are five essential DIY tools you should have:
• A cordless drill
• A circular saw
• A jigsaw
• A nail gun
• A palm sander
How do I become good at DIY?
Practice makes perfect when it comes to DIY and once you’ve tackled a task a few times, it won’t seem anywhere near as daunting.
10 essential DIY skills you need to learn
By doing some jobs around the house yourself, you’ll not only save money, but you’ll also boost your skills and confidence.
Here are 10 basic, but essential DIY skills you need to learn…
1 How to wire a plug
One of the most useful DIY skills out there, being able to wire a plug is a simple task – but many homeowners either don’t know how to do it, or they’re put off by dealing with electricity.
Here’s how you do it:
• Unscrew the plug cover to reveal the inside of the plug
• If the plug has a fuse inside, lift it out and put it to one side
• Place the main wire in the plug and then cut each individual wire so they are each around 1cm longer than the position of the three terminals
• Strip away enough of the plastic sheath on each individual wire to reveal around one quarter of an inch of bare metal
• Now it’s time to place the wires in the correct terminals. Here’s where they go…
• The green / yellow wire goes to the earth terminal at the top of the plug
• The blue wire goes to the neutral terminal to the left of the plug
• The brown wire goes to the live terminal on the right of the plug
• Fit the cable clamp over the main wire at the bottom of the plug and screw into place
• Give the bare metal of each individual wire a twist and then slide each individual wire into the relevant terminal and screw down the clamps
• Check each wire is connected to the correct terminal and then insert the right fuse for the appliance you’re attaching the plug to. Your appliance manual will tell you what amp fuse you need
• Reattach the plug cover and screw down tightly
If you’re unsure on wiring a plug, speak to a qualified electrician.
2 How to wire a light switch
If you need to wire a light switch because one has failed in your home, or you’re replacing the switch for a new one, it’s an easy process to master.
Here’s what to do if you’re replacing a switch:
• Turn off your power supply via your fuse box
• Check the lights aren’t turning on and unscrew your current switch faceplate from the wall
• You should have three wires to disconnect from your faceplate – a brown wire, a blue wire and a green and yellow wire.
• Your new switch should have two ports – one labelled L1 and one labelled Common or Com
• Connect the blue wire to the L1 port and the brown wire to the Common or Com port
• Connect the green and yellow wire, which is your earth wire, to the earth terminals in your back box and new switch plate. If your switch plate is plastic, it won’t have an earth terminal, so simply connect your earth to the earth terminal on your metal back box
Again, if you’re unsure about wiring a light switch, seek advice from a qualified electrician.
3 How to paint a room
While painting a room might seem like one of the simplest tasks on this list, it’s one that is very easy to get wrong – and this can ruin the look of a room.
Here’s how to paint a room like a professional:
• Prepare your walls for painting by removing any wallpaper, filling any holes or inconsistences and sanding them down
• Cover any furniture and the floor of your room. Use a roll of painter’s tape – like Frog Tape – to seal off the skirting board, coving, light switches or door surrounds you don’t want to paint. Run a putty knife over the tape to ensure a good seal, as this way no paint will get under the tape
• Use a clean piece of wood to thoroughly mix your paint
• Use a roller to paint the main sections of your walls, starting from the top of the wall and working your way down in W patterns to avoid roller marks and ensure good coverage
• Once you’ve finished the main part of the walls, use a high quality, clean brush to cut in along skirting board, door surrounds, coving and switches
• Once the paint is dry to the touch, apply a second coat
• Allow to dry again and remove your painter’s tape carefully
4 How to fix a leaking tap
Dripping taps aren’t just irritating, they’re expensive, too.
Not only can tap drips push your water bill up, they can cause water damage to your home if left.
If your tap is leaking from the spout, you’ll probably need to replace the washer, but if it’s leaking from the handle, it’s more likely to be the O ring that needs replacing.
Fixing a dripping tap is a definitely a job you can undertake as a novice in DIY – here’s how to fix one:
• Turn off your water supply via your stop cock or an isolation valve
• Turn the tap and run it until no more water comes out
• Unscrew your tap – the screw is usually found under the top of the tap, where the ‘Hot’ or ‘Cold’ decorative cover is
• Unscrew the remaining valve cover to reveal the inner part of the tap
• Loosen the valve and remove it from the tap
• Look for signs of wear on the black rubber washer and replace if needed
• If the O ring is worn, replace this, too
5 How to change a light bulb
Changing a lightbulb is a very straightforward task when it comes to DIY:
• Switch off the power at your fuse box
• If the light bulb you’re changing has been on, allow it to cool down before changing
• Once cool, use a step ladder so you can reach the bulb you want to change
• If your bulb is a bayonet fitting, push it upwards and then twist anti-clockwise to remove – remember, bulbs are delicate, so don’t grip too hard
• If the bulb is a screw fitting, simply turn it anti-clockwise until it comes free
• Insert the replacement bulb by doing the above in reverse
• Turn the power back on and test the new bulb
6 How to clear a blocked drain
Blockages usually occur in narrower pipework in your home, such as sinks or toilets.
But your drain outside your property can also become blocked, forcing smells, and sometimes waste, back into your home.
Tackling a blocked exterior drain can seem like a daunting task, but it’s well worth having a go at rectifying the issue before calling in any experts.
Here’s what you’ll need and how you do it:
• Long rubber gloves
• Protective clothing, goggles and a face mask
• A screwdriver to lift the drain cover
• A drain rod – these can be bought from most hardware stores
• A large bucket
• A pressure washer or hose
• Use your screwdriver to lift the drain cover, or a piece of rope if you need additional leverage
• If you can see the blockage near the surface, try to remove as much as you can by hand – it’s unpleasant, but will make rodding easier. Put anything you remove in your bucket
• Insert your drain rod into the drain and twist it clockwise into the blockage. Keep twisting and plunging the rod until it starts to work through the blockage
• If the water starts to drain away, you’re winning the battle
• Once you can start seeing the water drain away nicely, remove your drain rod and give the drain a good wash out with a pressure washer or powerful hose. This will remove any lingering debris
• If you’re still struggling to clear your drain blockage, you may have to call in professionals to fix the issue.
7 How to use a drill
Most modern drills do the hard work for you – which is part of their appeal.
But power tools like drills aren’t always as easy to use as you might think as they’re so advanced.
Here’s how to use a modern drill:
• Work out the size of the hole you need to drill and select the correct sized drill bit. If you’re drilling a hole to screw into, you should use a drill bit that is the same size as the screw you’re using, minus the threads
• Loosen the chuck, which is the circular section at the end of the drill, so you can insert the drill bit
• Re-tighten the chuck so the bit is secure
• If you’re drill is electric, plug it in. If battery powered, make sure you have a fully charged battery in place or this will affect the drill’s speed
• Most modern drills have speed settings. If you’re drilling a hole, you should use a high speed, low torque setting, while driving screws home using your drill requires a low speed, high torque setting
• Run the drill briefly to check it’s spinning in the right direction. Most drills run clockwise and anti-clockwise for screwing and unscrewing, so ensure your drill is set to clockwise if drilling a hole
• Hold the drill up and place the end of the drill bit on the spot where you want to create a hole, ensuring the drill is perpendicular to the material you’re drilling into (unless you want an angled hole)
• Press the trigger gently and start drilling slowly until the bit is entering the material, then speed up and push gently towards the material you’re drilling into
• When you’ve reached the depth you want, pull the drill away from the hole while keeping it running – this will clean out the hole you’ve just created
8 How to use a caulk gun
Caulk and sealant are must-haves as they protect areas of your home from water damage.
Your bath will be sealed in with sealant or caulk, as will your shower and any other areas where water flows freely.
There will be times when you need to re-caulk areas of your home, so knowing how to use a caulk gun can really help make the task simpler:
• Pull back the plunger on your caulk gun as far as it will go
• Place your caulk tube into the gun and press the plunger in until it makes contact with the bottom of the caulk tube
• Trim the tip off your caulk tube with a pair of scissors, remembering to start small as you can increase the size of the hole if you need to
• Squeeze the caulk gun’s trigger a few times until the caulk starts to flow into the tip
• Hold the gun at a 45-degree angle and press the trigger until the caulk starts flowing from the tip
• Keep the trigger squeezed with even pressure and move the gun slowly at a steady speed along the area you want to seal, making sure the thickness of the caulk is even
• Once you’ve finished, smooth the caulk with a damp finger
9 How to use a spirit level
We’ve all put up a lovely picture only to stand back and admire it and discover it’s not straight.
This is where knowing how to use a spirit level can help. Bubble levels are the most common type of spirit level, but laser levels are also available.
We’ll assume you’re using a bubble level to hang a picture using two nails in each corner:
• Pinpoint the height at which you want to hang your picture and place your level flat against the wall, with the top of it at the height you want
• Looking at the bubble on top of the level, move it up and down slowly from the right and left until the bubble is sitting in the middle of the vial
• Once you’re happy that your level is straight, use a pencil to mark a straight line along the top of the level, which is where you should insert your nails to hang your picture
10 How to reseal your bath
Bathroom sealant not only protects your bath from leaks down the sides, it can also add a nice finishing touch and clean, crisp finish to your bathroom.
Sealant does need replacing from time-to-time, so it’s worth knowing how to do it:
• For a neat finish, use strips of masking tape along your titles and the rim of your bath to create a thin line to run your sealant along
• Load your caulking gun with your sealant tube and trim the end of the tube’s nozzle with a pair of scissors
• Start in the corner of your bath, pressing your caulking gun’s trigger down gently and running along the edge between tile and bathtub
• Once you’ve finished, use a damp finger to smooth the sealant you’ve laid at a 45-degree angle, so any water off your tiles runs back down into your bathtub
• Sealant can take around 24 hours to cure, so make sure your bath isn’t used during this time
What DIY can I do at home?
As well as basic but essential DIY tasks, you could also consider taking on more complex jobs around the house yourself, including:
• Building DIY garden furniture
• Constructing a DIY shed
• Making and putting up DIY shelves
• Building a DIY desk
More complex DIY projects you can take on
Once you’re feeling more confident about you DIY skills, why not try some of these more complex DIY projects?
1. DIY garden furniture
These DIY outdoor chairs are made from bespoke-cut wooden slats from various timber sizes.
Once constructed, either wood stain or paint and cover with cushions.
Find out how to do it here.
2. A DIY shed
You can never have too much storage and constructing a DIY shed is a great way to create space for garden tools and bikes.
Find out how to do it here.
3. DIY shelves
Shelves are another great storage solution – and floating shelves like these can be a great DIY project to take on.
Once fitted, consider staining the wood or painting it to fit with your décor.
Find out how to do it here.
4. Build a DIY desk
Working from home has become more common since the Covid-19 pandemic and looks like it’s here to stay.
That means you’ll need a comfortable and stylish home office set-up.
Why not try constructing a bespoke desk yourself?
Find out how to do it here.
Further reading…
Buying a house in need of renovation can be a great way to create value and make a profit from property. But where do you start? Our guide explains everything.
If you’re selling your home, meanwhile, take a look at these property turn-offs you’ll need to avoid.
And if you’re looking to improve your property but have a tight budget, these great ideas will inspire you.